It’s that time of year!, the first draft of PCT permit applications were just a few days ago. If you made it through slow internet speeds and incessant page refreshing during the first permit process you’re now waiting impatiently for that congratulatory acceptance email saying:
Congratulations!
We’ve reviewed and approved your permit application. It looks great! Your trip is scheduled. Go ahead and make travel plans.
We’ll start issuing permits on Jan. 18. If you’re thinking of changing your permit dates or anything else, please do so before then. You can log-in to your permit management area to change your permit up until it is issued.
Once your permit is issued, it’ll be available for download in your permit management area. Once you download it, print it out and you’ll be all set.
Happy trails,
Jack Haskel
Trail Information Manager
By now your friends and family may be wanting to pitch in and help make your dreams come true but they have no idea what they could possibly get you! Likewise, you haven’t finished your own research yet in order to give them that Christmas wish list! Hopefully you’ll find this blog post worthy of helping with your own decisions and forwarding it to those who could use some incite.
So many reviews, so many blogs and opinions! With my PCT hike behind me now I look back at the untold hours of preparation and chuckle a bit at myself. Most evenings I was glued to my phone or PC reading the labyrinth of information about past thru-hiker gear and experiences. All of this was informative but added much indecisiveness and second guessing. I thought I needed to have it “figured out” as if what I finally decided on somehow could not be changed while on trail even though I read many times to the contrary.
Rest assured there will be a diverse group on trail from fast paced 12lb total weight to 50lb + pack weights. Don’t obsess, Do what you feel comfortable with and adapt while you learn on trail.
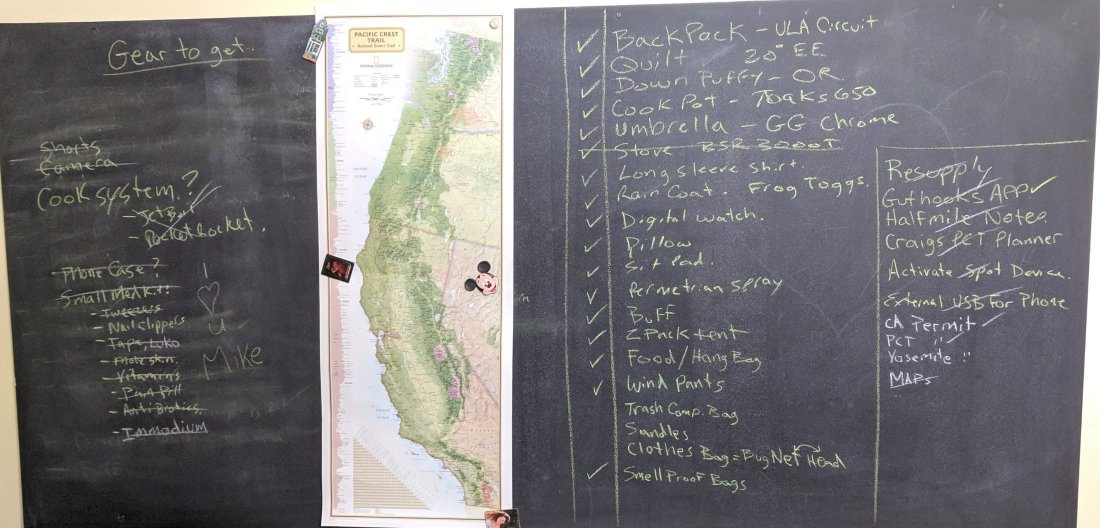
Above: The last check list before heading out to California. A chalkboard or whiteboard is useful for seeing your decision making as you drift off to sleep as well as trying to put that map into perspective. 👌
Prior to the PCT I had only been on a few overnight hikes from White Pass to Snoqualmie Pass on the PCT. On each trip I was laden with 35 lbs(15.8Kg) of gear and food. This time I wanted to push myself to lighten the load and read a lot about Ultralight but wasn’t completely obsessed with the movement. The Big 3 were my main priority: Shelter, Pack and Sleep system.
Shelter
Choosing a shelter proved to be the most difficult due to my height of 6’1″. After much debate I ordered the TarpTent Notch based on asking questions of others who reported success with it at my height. The price point was also reasonable. After playing my childhood game of fort building in my living room (I set it up in the house due to messy weather outside and possibly needing to return it) using furniture legs for tie down points it was soon evident it wouldn’t work for me. Laying inside this new man fort my head and feet were about 3″ away from the ends of the tent without my sleeping bag.

My second option was either the ZPack Duplex or the Hexamid Solo Plus. I ended up deciding on the Hexamid Solo plus due to the length (again cited for 6ft +) and an option of a removable floor (Bathtub as they call it due to its turned up sides). As of this post the Hexamid has now been replaced on Zpacks website by the Plexamid with a sewn in floor. The Hexamid gave me the option to have a ground sheet for cowboy camping which was handy. It was also wide enough to keep my gear inside rather than in a vestibule which I liked.
The Hexamid does take some getting used to for a proper setup which I only did a few times in my front yard on flat grass and soft soil (shown above). The length was still a bit of an issue due to the thickness of my Xlite Neo Air mattress, my sleeping bag still touched the end and the price was higher. Honestly at this point I was tired of searching for other options and decided to just make it work. Finally I could check this off the list!
Tip: I used a polycro ground sheet (sliding door window film from the hardware store for $8) under my tent every day. My tent was a big investment and I didn’t want tree sap making a mess of it. Plus the added layer helped keep ground condensation away.
Initially, I wanted to push my comfort level and just use a tarp and bivy combo but this decision was overruled by family worrying it wouldn’t offer much protection from the elements. I had no problems with how the Hexamid performed, I can’t believe the tie points didn’t rip off during extreme wind the night before Tehachapi! I recall leaning my pack up against the interior to reduce wind fiercely flapping the fabric.
Condensation was an issue with most shelters and I learned to deal with it, lunchtime usually meant it was time to hang things out to dry!

Above: Left to right, Blackholes North Face tent, Peanut Feet’s green tarp, Bud Lights Zpacks Duplex and my Hexamid Solo Plus looking over the stream after a drizzly night. Peanut Feet only used his tarp around 8 times during the whole trip.
Pack
For my prior overnight hikes I used the Osprey Atmos 65 at 4 lbs 10oz. While the Atmos was very comfortable I knew this was an area I should cut weight. I ended up deciding on the ULA Circuit at 2lbs 5oz with 3 more liters of capacity. Again the price point, weight and material durability complimented each other. There were lighter packs out there but this suited my needs plus other packs like SWD had long lead-times that didn’t meet my departure date (my indecision contributed, I should have thought of ordering sooner).
My heaviest carry was from the resupply in Lone Pine (day 51/mile 745) to Vermilion Valley Resort (VVR, day 60/mile 882) due to adding a bear can, ice ax, micro spikes, misc extra clothing and more food. I’m unsure of the actual weight when I left Lone Pine but I think it was pushing the max capacity of the Circuit at 35 lbs as it was getting uncomfortable. More weight equates to comfort issues, its not necessarily the packs fault IMO, I’d do it again with the Circuit.
If you recall, this section of the Sierra kicked my butt and I lost about 15 lbs (30lbs total from Campo to Lake Tahoe. VVR wasn’t really that far from Lone Pine at 137miles but I hadn’t anticipated the added calorie burn due to the huge elevation gains. I may have been the only one who didn’t detour into Bishop for resupply. I ended up having a cup of coffee and a few Life Savors left on the last day to VVR. My decision to stay the night in Crabtree Meadows to summit Mt Whitney left me short on food.
Tip: Take good care of your pack, lifting with the top hoop or by both straps. Choosing good places to set it on the ground as well. Due to this it’s still in great condition.
Sleep System
Mummy Bag vs Quilt? 10 degree vs 20 degree? Do I change to a 30 degree after the Sierras? Be Ultralight and use an 1/8″ thick foam pad! Pillow? Who needs a Pillow use your clothing bag!!! So goes the endless reviews and I get it, everyone sleeps differently. I know I put off heat like a furnace when I sleep so I chose a 20 degree rating. I really have no basis for this other than past hiker comments because I hadn’t slept outdoors in freezing temperatures.
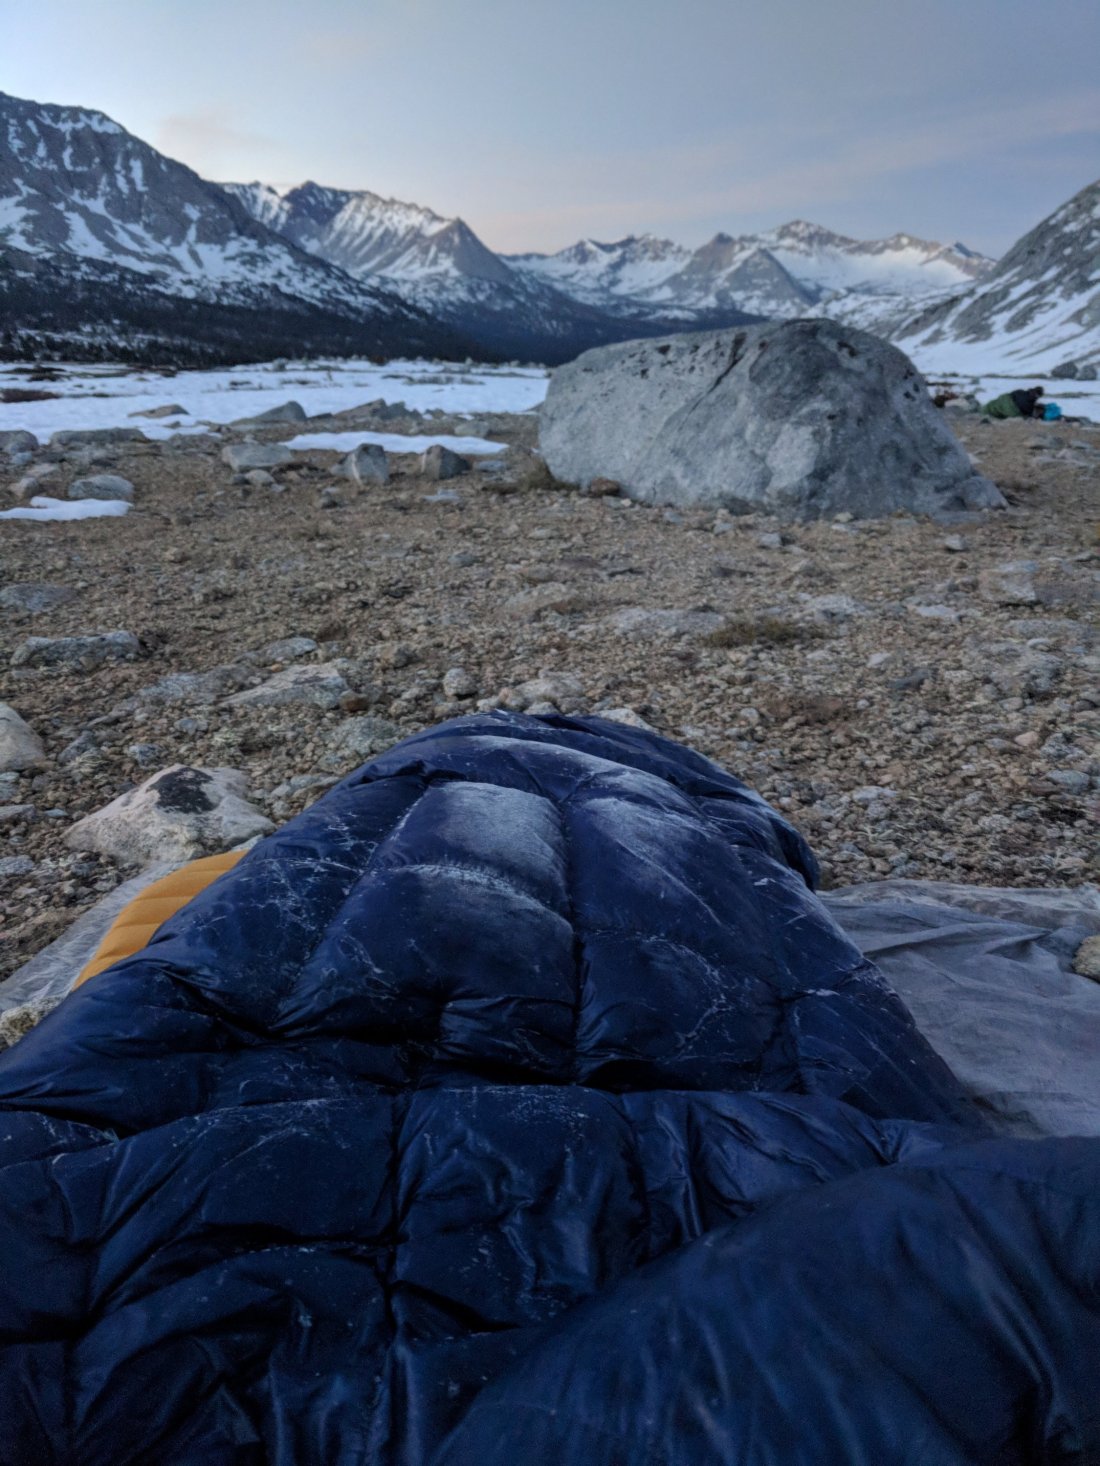
People were raving about Enlightened Equipment so I just went with them and chose a Revelation Quilt over a mummy bag. I’ve used mummy bags before and found that I toss and turn at night getting twisted up. For this reason I chose the quilt and the option to use it as a blanket was appealing, remember dual uses. My coldest, most uncomfortable night had to have been day 57 when Nocello, Peanut Butter, Doe Doe and I cowboy camped at 11,000ft just below the summit of Mather Pass. I was a bit jealous of their mummy bags during that night but they reported being uncomfortable as well. Below is a pic from that morning!
For my sleeping pad I knew I couldn’t use a thin pad or the Thermarest Zlite Sol, these were just to thin and I’m a side sleeper. I went with the Neoair xlite and was really pleased but it is noisy like some reviews mentioned. I still used 6 sections of my old Zlite Sol as a sit pad during the day and at night used it under my Neoair/torso area for added puncture resistance from thorny things. The Neoair did develop a slow leak that I couldn’t locate and when I was in Bend, Or the REI there exchanged it without question! I highly suggest REI purchases for their 1 year guarantee. I took good care of it but things happen, do plan on these kind of failures as several classmates had leaks with different brands as well.
So that does it for the Big 3, if you have any questions about these items let me know! Next up the small stuff
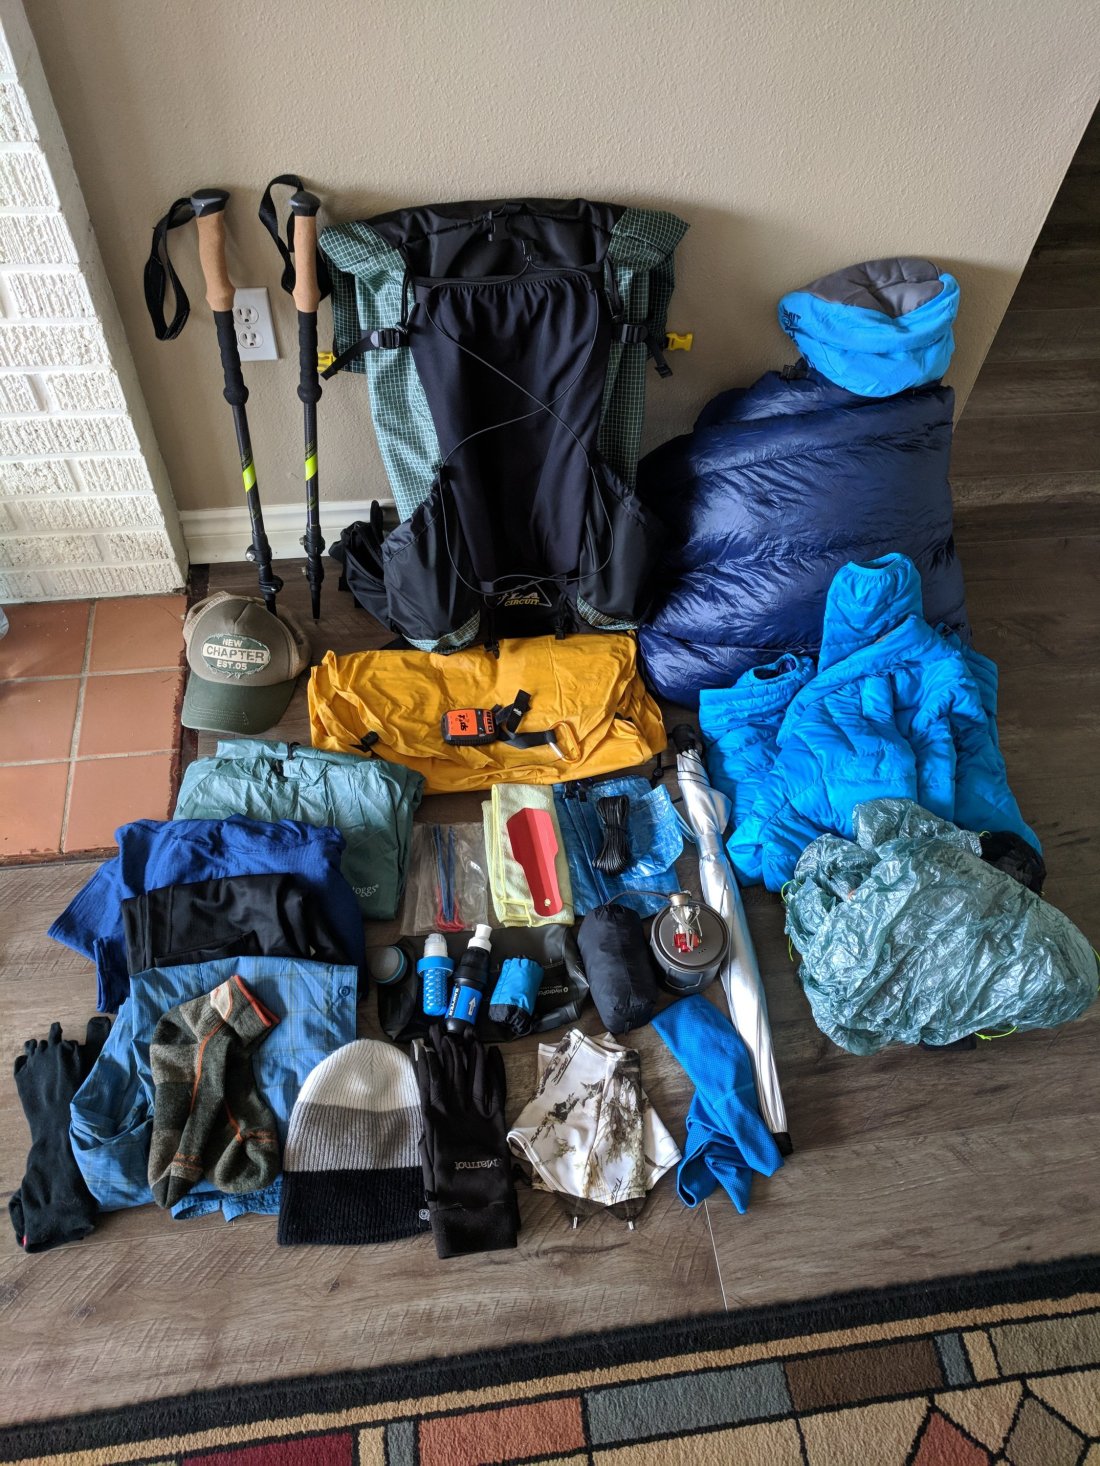
Above: My glorious gear pic and good ole pink/brown tile….yep I’m remodeling the floors!
- Trucker Hat- I thought about a full brim sun hat but I’d be using a bandanna to cover my neck and ears so I didn’t see the need for a sun hat. Bandannas have so many uses!
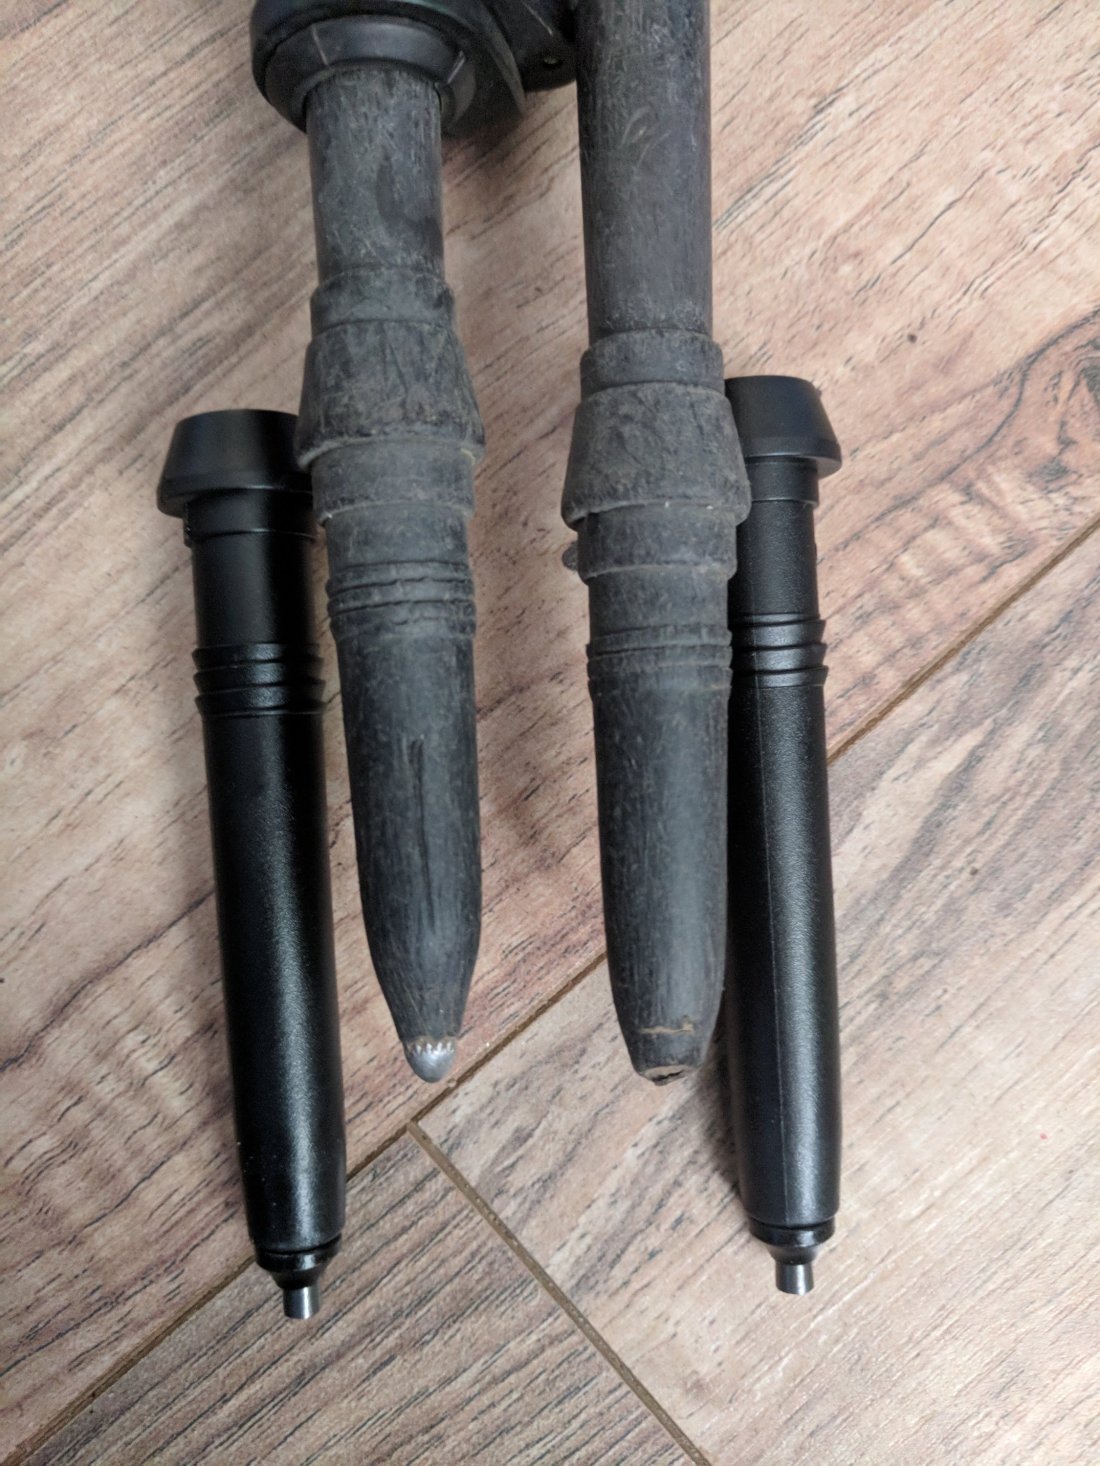
- Cascade Mountain Tech Carbon Fiber Trekking Poles with Cork grips $40- I’m happy that I didn’t spend $100+ on trekking poles. These actually lasted the whole trip (thanks to Penguin for grabbing them when I left them on the side of the road and in a shopping cart in Tehachapi!). I replaced 3 tips due to one break and 2 being worn to the plastic, I’m certain I’ll get many more miles out of these. Tip #1: When you get to towns or hitching collapse the poles and strap them to your pack right away so they aren’t left behind. Plus, potential rides won’t see you holding two spears as they approach trying to make a split second decision whether or not to pick you up lol! Tip#2 In Lone Pine I tried soaking the tips in boiling water to remove the old ones which didn’t work for me. Instead I had to use a very sharp knife to whittle away the hard plastic without cutting into the pole. This worked best after boiling it to soften the plastic. The new ones just slip on with a friction fit.
- ULA Circuit Pack, thumbs up!
- Enlightened Equipment 20 degree quilt & Sea to Summit Pillow. Since I side sleep the pillow helped prevent neck pain.
- NeoAir Xlite mattress and Spot Gen 3 GPS beckon. Most everyone on trail seemed to have some sort of GPS tracking. The Spot and Garmin Inreach were the most popular. If I did this again I would opt for the Garmin due to the 2-way texting option and weather reports. Although, be sure to tell loved ones back home that the 2-way messaging isn’t for day to day banter. It was also handy to be able to message hikers who were ahead to see how conditions in the Sierras were.
- Blue Outdoor Research Trancendent Down puffy $96 clearance online at REI. I wasn’t very hip on the color but it was all that was available. It wasn’t the lightest or most compact but it was the right price. I don’t think I used it but 2 or 3 times in Washington. My layers listed below kept me plenty warm once I was up and moving. Even on rather chilly mornings my capilene top with FroggTogg jacket kept a good heat balance and I could unzip the jacket to release heat.
- FroggToggs UL jacket, Patagonia Capilene Base Layer Hooded Top and Bottoms and Columbia Silver Ridge Sun Shirt. The Frogg Toggs were common place on trail and worked really well in rain and on wind chilled mornings where the Puffy would be to warm. The zipper did rip a few inches but for $15 it did what I needed it to do. This is a great multi-use layer that didn’t dent my budget! The Patagonia base layers were great and I mostly used them as sleeping clothes. Highly recommend the Columbia long sleeve shirt. It definitely won the war but had a few self inflicted injuries due to removing a low hanging branch from the trail which snapped taking half my sleeve with it.
- 2 liter HydraPak bladder with Katadyn Befree filter , Sawyer Squeeze filter & 4ea 1 liter smart water bottles (not shown). Initially I took both filters to Campo but at the last minute sent the BeFree back home as I had experience with the Sawyer. It wasn’t until Belden, CA (1286.8) that I switched to the Befree. The flow rate is exceptional but do beware of using cloudy water. During the detour after Callahan Lodge I had to use lake water full of algae and it significantly reduced the flow rate on the first liter. Field cleaning the Befree didn’t sufficiently improve the flow rate so I switched back to Sawyer in Bend, Or.
- Zpacks Tent stakes, Bug Head Net, Zpacks Food Bag and Hanging Kit, Deuce of Spades, microfiber hand towel, Montbell wind pants, Beanie, neck buff, gloves, Dirty Girl Gators, Injinji and Darn Tough socks. Of these items the neck buff and Injinji socks were sent back. Eventually I figured out that I did not need toe socks to prevent blisters. I used 3 pairs of Darn Tough socks, washing them whenever possible and rotating them. TIP: Even though they seemed to fit well I learned that sizing socks correctly actually prevents getting holes in them. Darn Tough was able to figure out over the phone with Kelly that I was wearing the wrong size and sent the correct size direct to Cascade locks before I even sent back my bad ones! Great customer service!
- Toaks 650 Titanium Pot, MSR Pocket Rocket and Gossamer Gear Liteflex Umbrella $40, and ZPacks Hexamid Solo Plus. I originally started the trail with a JetBoil Flash, while this stove works great it just took up to much volume in my pack. I switched to the Toaks and MSR for probably 3/4 of the trail. The MSR and small fuel canister nest together inside the Toaks 650 taking up 1/2 the space in my pack. The umbrella was great but it was more often windy than not and was stored most of the time. plus I never could figure out a good way to attach it to my pack making it hands free.
- Other misc items: small plastic compass clipped to my shoulder strap, Road ID wrist bracelet that lists emergency contact info, $12 Casio wrist watch, spare trekking pole tip and nail clippers. The last two could have been purchased as needed but I preferred to have them now rather than waiting 5+ days.

Above: my basic first aid kit which included:
- Gold Bond powder for chaffing which never became an issue, I discarded it in Warner Springs.
- Small assortment of Band-Aids.
- Burn cream and cortisone cream packets, sunscreen, antibiotic ointment.
- Pills: Tylenol, Amoxicillin for potential sinus infection which did happen and I did use them!, Ibuprofen and used plenty of them for swelling knee & ankles, Imodium for diarrhea again not used!!, Tums chewables(not used) and multi vitamins. I had one multi-vitamin every evening before bed to help replenish myself.
- Needle and thread (used it several times), hand sanitizer, tent and sleeping pad patch repair (never used), tweezers & scissors (small scissor comes in handy for cutting leukotape/moleskin. I recommend leukotape over moleskin. Finally, Floss which I ended up changing to a flossing tool because I didn’t want dirty hands in my mouth.
Note: my post trail dental check-up got gold stars from Dr Riehl 👌👌, this was a personal success goal of mine.
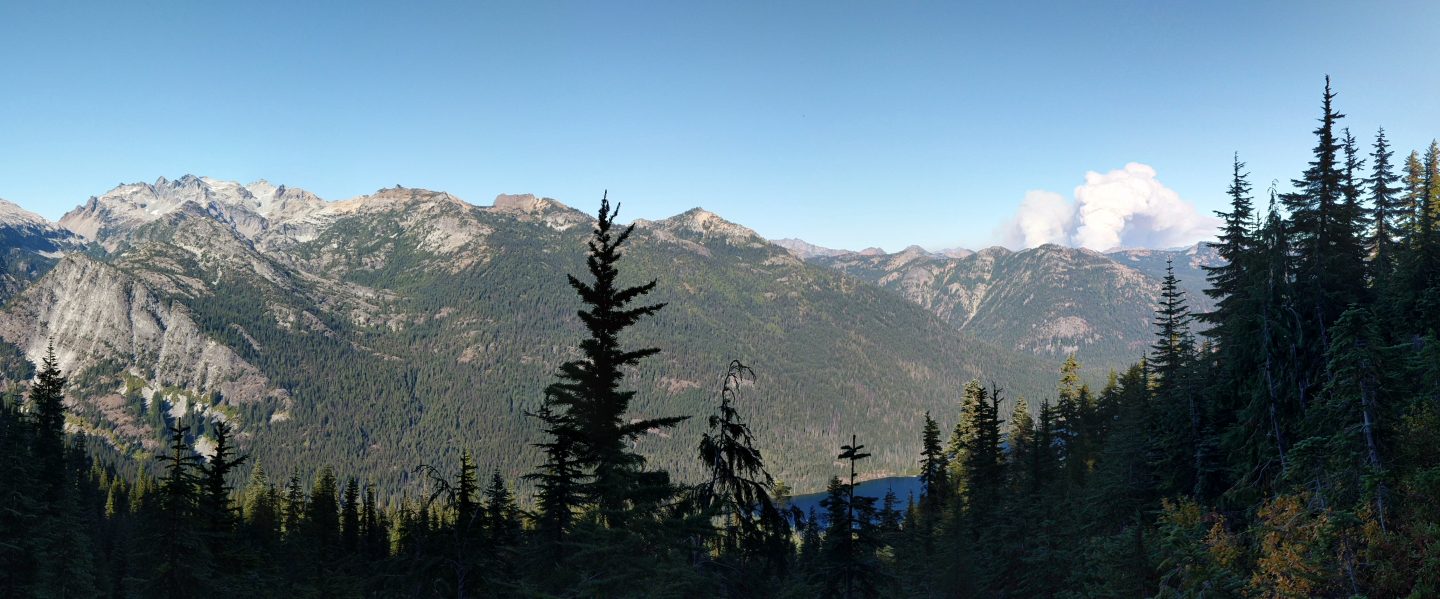
The Sierras
When I reached Kennedy Meadows south (702 on May 26th) evening temps were dipping. At the local gear shop Triple Crown Outfitters I added a silk sleeping bag liner to help fend off drafts and also purchased a Sea to Summit waterproof bag for my electronics. In Lone Pine (766 on May 29th) my resupply included an Ice Ax, Bear Vault BV500, Sea to Summit eVent Compression Dry Bag for my Quilt (recommended by Froggy and I used it throughout the rest of the hike), a pair of waterproof neoprene socks and $30 Unigear Traction Cleats (micro-spikes). These spikes were by far the best investment for the Sierras due to the crusty snow.

People were on the fence about taking an Ice ax or not and I had personally never used one until this trip. There had been a snow storm the week earlier of about 12″ which made classmates detour off the mountain. My thoughts were to just carry the Ax!! Why be so wishy washy when you can certainly ship it back home or ahead somewhere. I did hold my Ax twice on steep slopes but did not need to self arrest. Tip: The outfitter in Lone Pine showed me to use a length of paracord (instead of a Leash) tied to my belt and the other end tied to the Carabiner Hole of the Ax. The length of cord should be slightly less than your arms length so that it can be reached if you fall and it leaves your hand.
Besides the neoprene socks I didn’t feel the need for anything more in the way of clothing. Neoprene socks may not have been needed either but I knew with lower temps and many water crossings ahead of me that I didn’t want really cold feet. This was a small weight penalty but would be worth having warm feet.
Memories on Paper

Right up to the night before leaving to Campo I was going back and forth on how best to document this trip. So many blogs about types of cameras but I had narrowed it down to the Sony A6000 for around $700. I like taking pictures and many have said I have an eye for composition but I’ve never taken the time to learn the finer points of lenses, ISO, aperture and shutter speeds etc. In the end I chose to stick with my current cell phone the Google Pixel XL which performed just great for my needs. I also set my photos to automatically upload to Google Photos for free, as of this blog post of the 128GB I’ve used 26GB. Tip: I purchased a shoulder strap pouch from ULA that fit my phone perfectly and allowed quick access for when wildlife popped up.
Electronics and Apps
Anker Power Core II Slim 10000 $35, Anker Quick Charge 3.0 Dual USB Wall Charger $26, Scandisc Ultra 128GB Dual Drive USB/Type-C $35, Guthooks App. There isn’t a lot to discuss here, these worked well for me however the wall charger was rather heavy. I would suggest getting an App for side trails when fire detours happen. One such App people had was Gaia. I used Guthooks many times in the Sierras where the trail was lost and I was able to get back on trail.
That about does it for my gear, I’m sure I may have missed a few things so if you have any questions feel free to contact me or comment below. Also, I decided to give the Amazon Affiliate Program a try for the first time on this post. Some links above will direct you to Amazon.
Edit 12:6:18, well my Amazon Affiliate Application was rejected so sadly I’ve removed their links.
Take Care
BaZinga!

Great info! Should be very helpful to new PCT hikers!
LikeLike